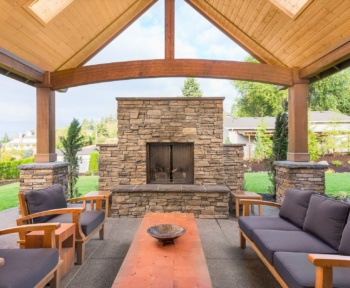
A fireplace mantel is a beautiful addition to any home, and can be easy to build with the right instructions. The first step is to decide on the material you want to use for your mantel. Wood is a popular choice because it can be stained or painted to match your décor, but other materials like stone or marble can also be used.
Once you have your material selected, it’s time to measure the dimensions of your fireplace opening and cut your mantelpiece to size. If you’re using wood, you’ll also need to drill pilot holes for the screws that will secure the mantel to the wall. Finally, install brackets or corbels on either side of the mantel for added support and decoration.
With these simple steps, you can build a beautiful fireplace mantel that will add warmth and charm to your home for years to come.
- Decide on the size and style of mantel you want
- Purchase the lumber and any other materials needed to build the mantel
- Cut the lumber to the appropriate sizes for your mantel using a saw
- Drill holes in the lumber as needed for attaching pieces together with screws or nails
- Assemble the mantel piece by piece, starting with the bottom and working up to the top
- Attach the Mantel to The Wall Above The Fireplace following instructions that come with your particular model
How to Build a Fireplace Surround
If you’re looking to add a fireplace to your home but don’t want the hassle and expense of a full renovation, then building a fireplace surround is the perfect solution. Fireplace surrounds can be made from a variety of materials including brick, stone, marble, or even tile. And the best part is that they can be customized to fit your specific style and space requirements.
Building a fireplace surround is not as difficult as you might think. With some basic carpentry skills and the right tools, you can easily build a beautiful surround that will add both value and appeal to your home. Here’s what you need to know about how to build a fireplace surround:
1. Decide on the material you want to use for your surround. As mentioned above, there are many different options available including brick, stone, marble, and tile. Consider the overall style of your home when making your selection and choose a material that will complement your décor.
2. Measure the area where the surround will be installed and create a template out of cardboard or plywood that matches these dimensions. This will be used as a guide when cutting the pieces for your surround. 3 .
Cut the pieces for your surround according to the template using either a miter saw or jigsaw . If you’re using stone or tile , you’ll also need to drill pilot holes in order to accommodate for expansion joints . Be sure all of your cuts are precise in order to avoid any gaps between pieces once everything is assembled .
4 . Assemble the pieces of your surround using construction adhesive and/or mortar , depending on the material you’ve chosen . If necessary , prop up each piece with bricks or blocks until it dries completely in order to prevent it from sagging .
Fill any joints with caulk or grout once everything is dry . Let cure according to manufacturer’s instructions before continuing .
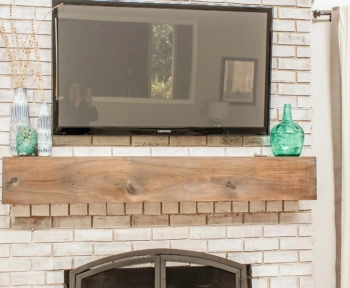
How to Build a Mantel on a Brick Fireplace
If you have a brick fireplace, you may be wondering how to build a mantel on it. Here are some tips to help you get started. First, measure the width and height of your fireplace opening.
You’ll need to know this so you can purchase the correct size mantel. Next, decide what style mantel you want. There are many different styles available, so take some time to browse through some options before making your final decision.
Once you have your mantel piece, it’s time to start attaching it to the fireplace. You’ll need to use masonry screws or nails and anchors for this step. First, locate the studs in the wall behind the fireplace using a stud finder.
Then, mark where you’ll be attaching the screws or nails with a pencil so you know exactly where to drill into the bricks. Now it’s time to start attaching your mantel! Begin by screwing or nailing into the studs that you marked earlier.
How to Build a Floating Mantel
If you’re looking to add a bit of character to your home, consider building a floating mantel. Not only are they unique and eye-catching, but they’re also relatively easy to build. Here’s how:
1. Start by measuring the wall space where you want your mantel to go. Then, cut two pieces of lumber that are the same length as the measurement you took. These will be the sides of your mantel.
2. Next, cut a piece of plywood that is the same width as the two pieces of lumber. This will be the top of your mantel. 3. Use a drill to create pilot holes in each piece of lumber.
Then, use screws to attach the plywood to the lumber, making sure that it is flush with the edges. 4 . Now it’s time to attach your mantel to the wall .
Find studs in your wall using a stud finder , and mark their location on each side of your mantel opening . Drill pilot holes into these marks , and then use screws or nails ( depending on what type of wall you have ) to secure your mantel in place . 5 .
The final step is optional , but we recommend adding trim around your mantel for a more polished look . Simply measure and cut trim pieces to fit around all four sides of your Mantel , and then use nails or glue ( again , depending on your wall type ) to attach them in place . And there you have it!
Your very own floating mantel!
How to Build a Fireplace Mantel With Crown Molding
One of the most popular design trends today is adding a fireplace mantel with crown molding. This can add both style and value to your home, and it’s not as difficult as you might think. Here’s how to do it:
1. Start by measuring the width and height of your fireplace opening. You’ll need this information to determine the size of your mantel piece. 2. Next, decide on the style of mantel you want.
There are many different options available, so take some time to browse through magazines or search online for inspiration. 3. Once you’ve settled on a style, it’s time to start shopping for materials. Crown molding is readily available at most home improvement stores, but you may need to special order it if you’re looking for a specific style or color.
4. When you have all of your materials, it’s time to start assembling your mantelpiece. Begin by attaching the crown molding around the perimeter of the fireplace opening using construction adhesive and finishing nails. Then, cut your mantel piece to fit and attach it in the same way.
If you’re adding any decorative details like corbels or trim work, now is the time to do that as well. 5 . The final step is to add a finish of your choice (paint, stain, etc.) and then install your new mantelpiece!
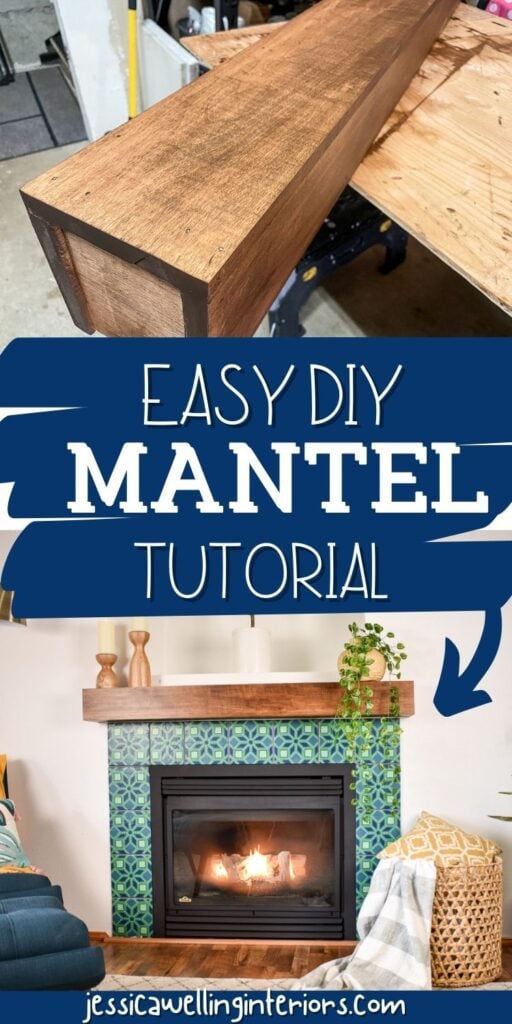
How Do You Make a Homemade Fireplace Mantel?
If you’re looking to add a touch of coziness to your home this winter, why not build a fireplace mantel? It’s easier than you might think, and with a little bit of creativity you can create a truly unique piece for your home. Here’s how:
First, gather your materials. You’ll need some lumber (we used 2x4s), some plywood, saw horses or another sturdy work surface, clamps, sandpaper, wood glue, a hammer and nails. You’ll also need something to use as a template for your mantel – we used an old picture frame.
Once you have everything gathered, cut your lumber to size using the saw horses or other work surface as a guide. Cut four pieces for the sides of the mantel and two pieces for the top and bottom. These will be the basic structure of your mantel shelf.
Next, use the plywood to create panels for each side of the mantel shelf. We cut ours to fit snugly between the 2x4s we’d cut earlier. Once all four panels are cut out, use sandpaper to smooth any rough edges.
Now it’s time to put it all together! Apply wood glue generously to one end of each 2×4 side piece and then clamp them together with the plywood panels in between. Make sure everything is lined up nicely and let the glue dry completely according to manufacturer’s instructions – overnight is usually best.
Once dry, unclamp everything and flip it over so the glued joints are on the underside of the mantel shelf. Hammer nails into each joint to reinforce it further (this step is optional but does help ensure a sturdier final product). Finally, apply another layer of wood glue over all of the joints and let dry completely before proceeding to Step 4 .
If desired, paint or stain your Mantel Shelf now before moving on 4) Now that everything is glued & dried securely in place its time decide how wide/thick you want your Mantel legs/supports too be . We went with 6″ wide x 1 1/2 ” thick blocks . So we ripped (cut along length) our remaining 2x4s down into 6″ strips using our table saw , then cross-cut them into 6″ chunks using stop blocks on either side of our blade set at 6″ .
What Kind of Wood Should I Use for a Fireplace Mantel?
When it comes to choosing a wood for your fireplace mantel, there are a few things to consider. The most important factor is the moisture content of the wood. You want to choose a wood that has a low moisture content so that it doesn’t warp or crack when exposed to the heat of the fire.
Some good options include cherry, oak, and maple. Another thing to keep in mind is the weight of the wood. Heavier woods like oak will require more support, so make sure your mantel is properly supported if you go with one of these options.
Finally, think about the look you want for your mantel. Different woods have different grain patterns and colors, so decide what kind of aesthetic you’re going for before making your final selection.
How Thick Should a Wood Fireplace Mantel Be?
A wood fireplace mantel should be at least 6 inches thick in order to provide adequate support for the weight of the mantel. The thickness of the mantel will also affect the overall appearance of the fireplace, so it is important to choose a thickness that is proportional to the rest of the fireplace.
How Long Does It Take to Build a Fireplace Mantel?
Building a fireplace mantel can be a quick and easy project or it can take several days, depending on the size and complexity of the mantel. A simple mantel can be built in a day or two, while a more elaborate mantel may take a week or more. The most important factor in determining how long it will take to build a fireplace mantel is the level of experience of the builder.
A experienced carpenter will be able to build a mantel much faster than someone with no experience.
Conclusion
Building a fireplace mantel may seem like a daunting task, but with some basic carpentry skills and the right materials, it can be surprisingly easy! Here’s what you’ll need to get started: – A piece of plywood or MDF that is at least 2 feet wide and 4 feet long.
– A 2×4 that is 8 feet long. – 1/2 inch thick sheets of drywall. – Construction adhesive.
– Nails or screws. To begin, cut your plywood or MDF to size using a saw. Then, use the construction adhesive to attach the drywall sheets to either side of the plywood or MDF.
Once the adhesive has dried, nail or screw the 2×4 onto the back of the mantel piece, making sure that it is level and flush with the top edge. Now you’re ready to install your mantel! If you’re attaching it directly to a brick fireplace, use masonry anchors and screws.
If you’re attaching it to drywall, use wall anchors and screws. Either way, make sure that your mantel is securely attached before decorating it with candles, photos, plants, or anything else!